cat ~/projects/building-jamesdooley-dev.md
Project 1: How I Built and Secured My Own Website and Email Domain
Registering jamesdooley.dev, moving DNS to Cloudflare, setting up authenticated email with Proton, and deploying an Astro site on Cloudflare Workers.
On this page
At a glance
| Goal | Get a real website and email address on my own domain, set up properly and securely |
| Time | About 15 hours over a few days |
| Cost | About $13/year (just the domain). Everything else is on free plans or something I already pay for |
| Stack | Cloudflare (DNS, hosting, TLS), Proton Mail, Astro, GitHub, Claude Code |
| Results | SPF, DKIM and DMARC all pass · 10/10 on mail-tester · A- on SSL Labs · site live at jamesdooley.dev |
Why I built this
I’ve been building up my LinkedIn and GitHub, and I kept running into the same problem: neither one is a great place to put a full write-up of a project. LinkedIn posts get buried in a few days, and GitHub is great for code but not really for telling the story of what I did and why. I wanted one place I control that holds my resume, my projects, my write-ups and a way to contact me.
I also wanted an email address on my own domain instead of a random Gmail. It looks more professional on a resume, and honestly, setting up email correctly turned out to be one of the most educational parts of this whole thing.
The other reason is that a personal site is a pretty good security project by itself. There’s DNS, email authentication, TLS, deployment, and account security all in one. So the plan was simple: get a working template live first, make sure the foundation is set up right, and fill in the content over time.
One thing I want to be upfront about: I used AI tools a lot on this project. I used Claude to plan the setup and write a detailed spec, and Claude Code to write most of the website code from that spec. I did the account setup, DNS, email, deployment and security settings myself, and I made sure I understood what every piece did before moving on. AI tools are getting really good, and learning how to use them well is a skill I think everyone in tech needs to have right now.
The big picture
Before getting into the steps, here’s how everything connects. It took me a while to fully get this, so hopefully the diagram saves you some time.
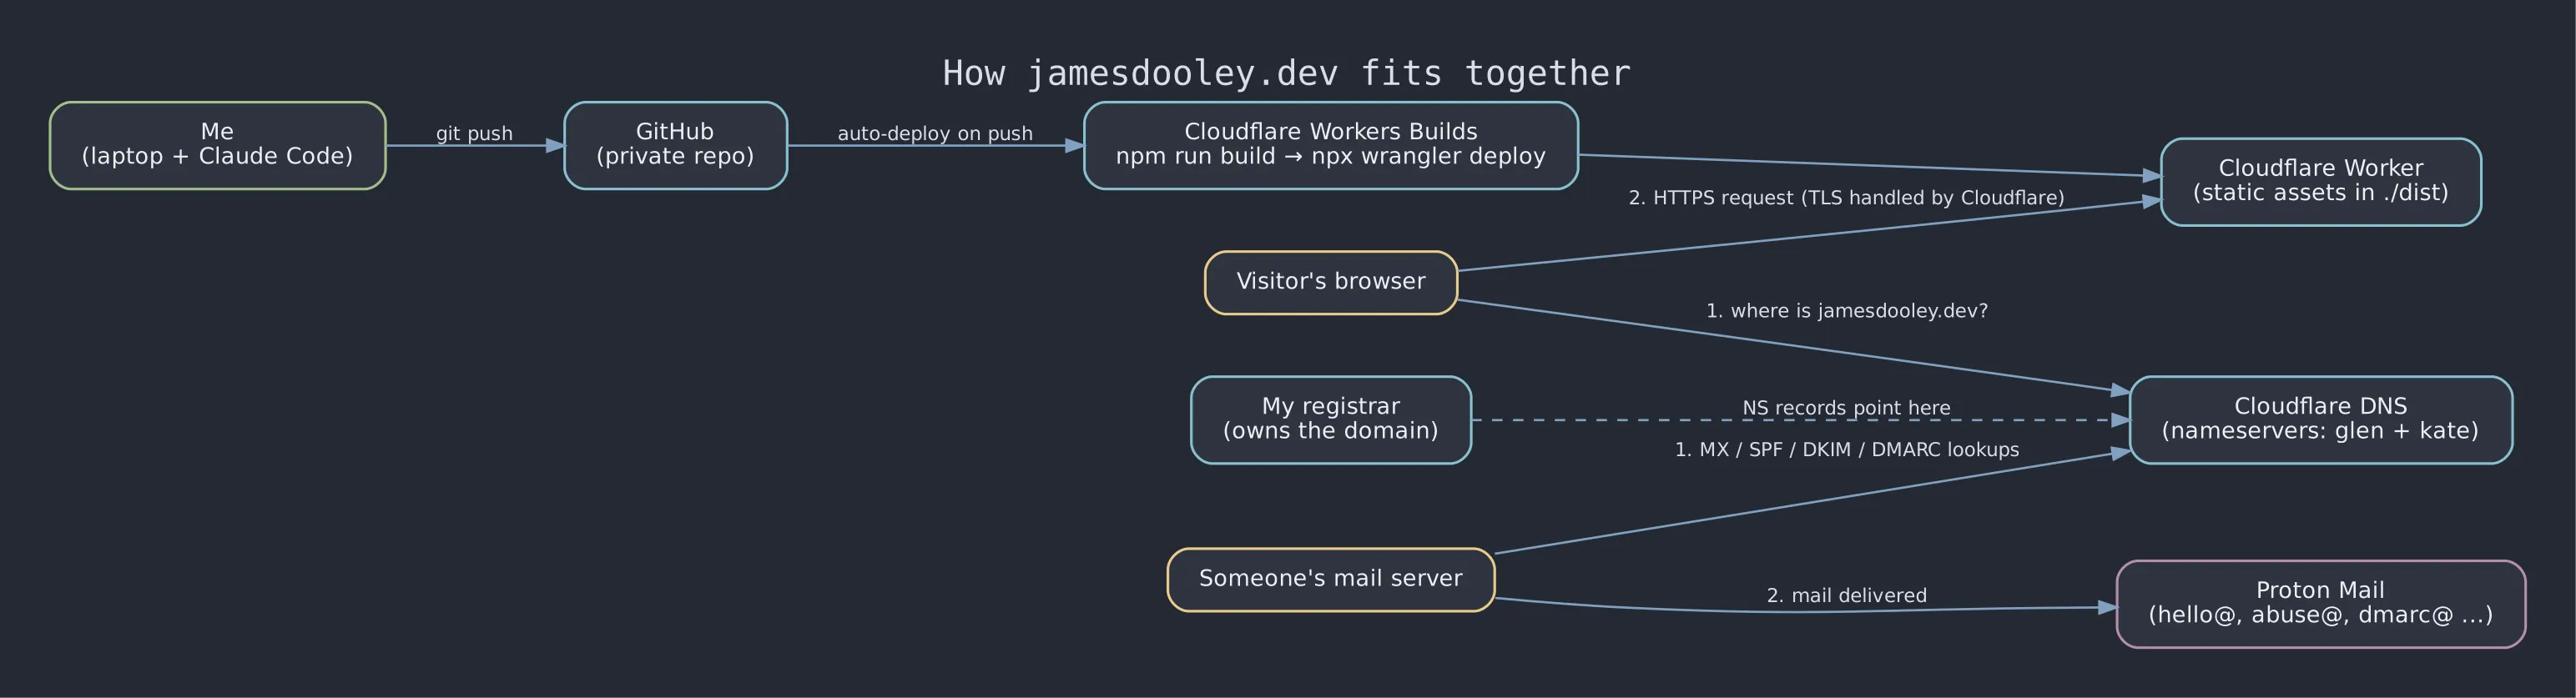
The short version:
- The registrar is where the domain is actually registered. It’s basically the “owner of record.” The only thing I really needed from it was to point the domain at Cloudflare’s nameservers.
- Cloudflare DNS is the phone book. When someone types jamesdooley.dev or sends me an email, their computer asks Cloudflare where to go.
- Cloudflare Workers hosts the actual website files and handles HTTPS.
- GitHub holds the code. Every time I push, Cloudflare rebuilds and redeploys the site automatically.
- Proton Mail receives and sends my email. DNS records tell the rest of the internet that Proton is allowed to send mail for my domain.
Step 1: Moving DNS to Cloudflare
The domain is registered through my registrar, but I wanted Cloudflare to run the DNS. Cloudflare gives you free DNS, free TLS certificates, easy security settings and hosting all in one dashboard, which makes everything after this a lot easier.
The order here matters. I moved DNS to Cloudflare before setting up email. If I had added the email records at the registrar first and switched later, I would have had to recreate every record and could have broken email during the switch.
First I added the domain in Cloudflare on the free plan.
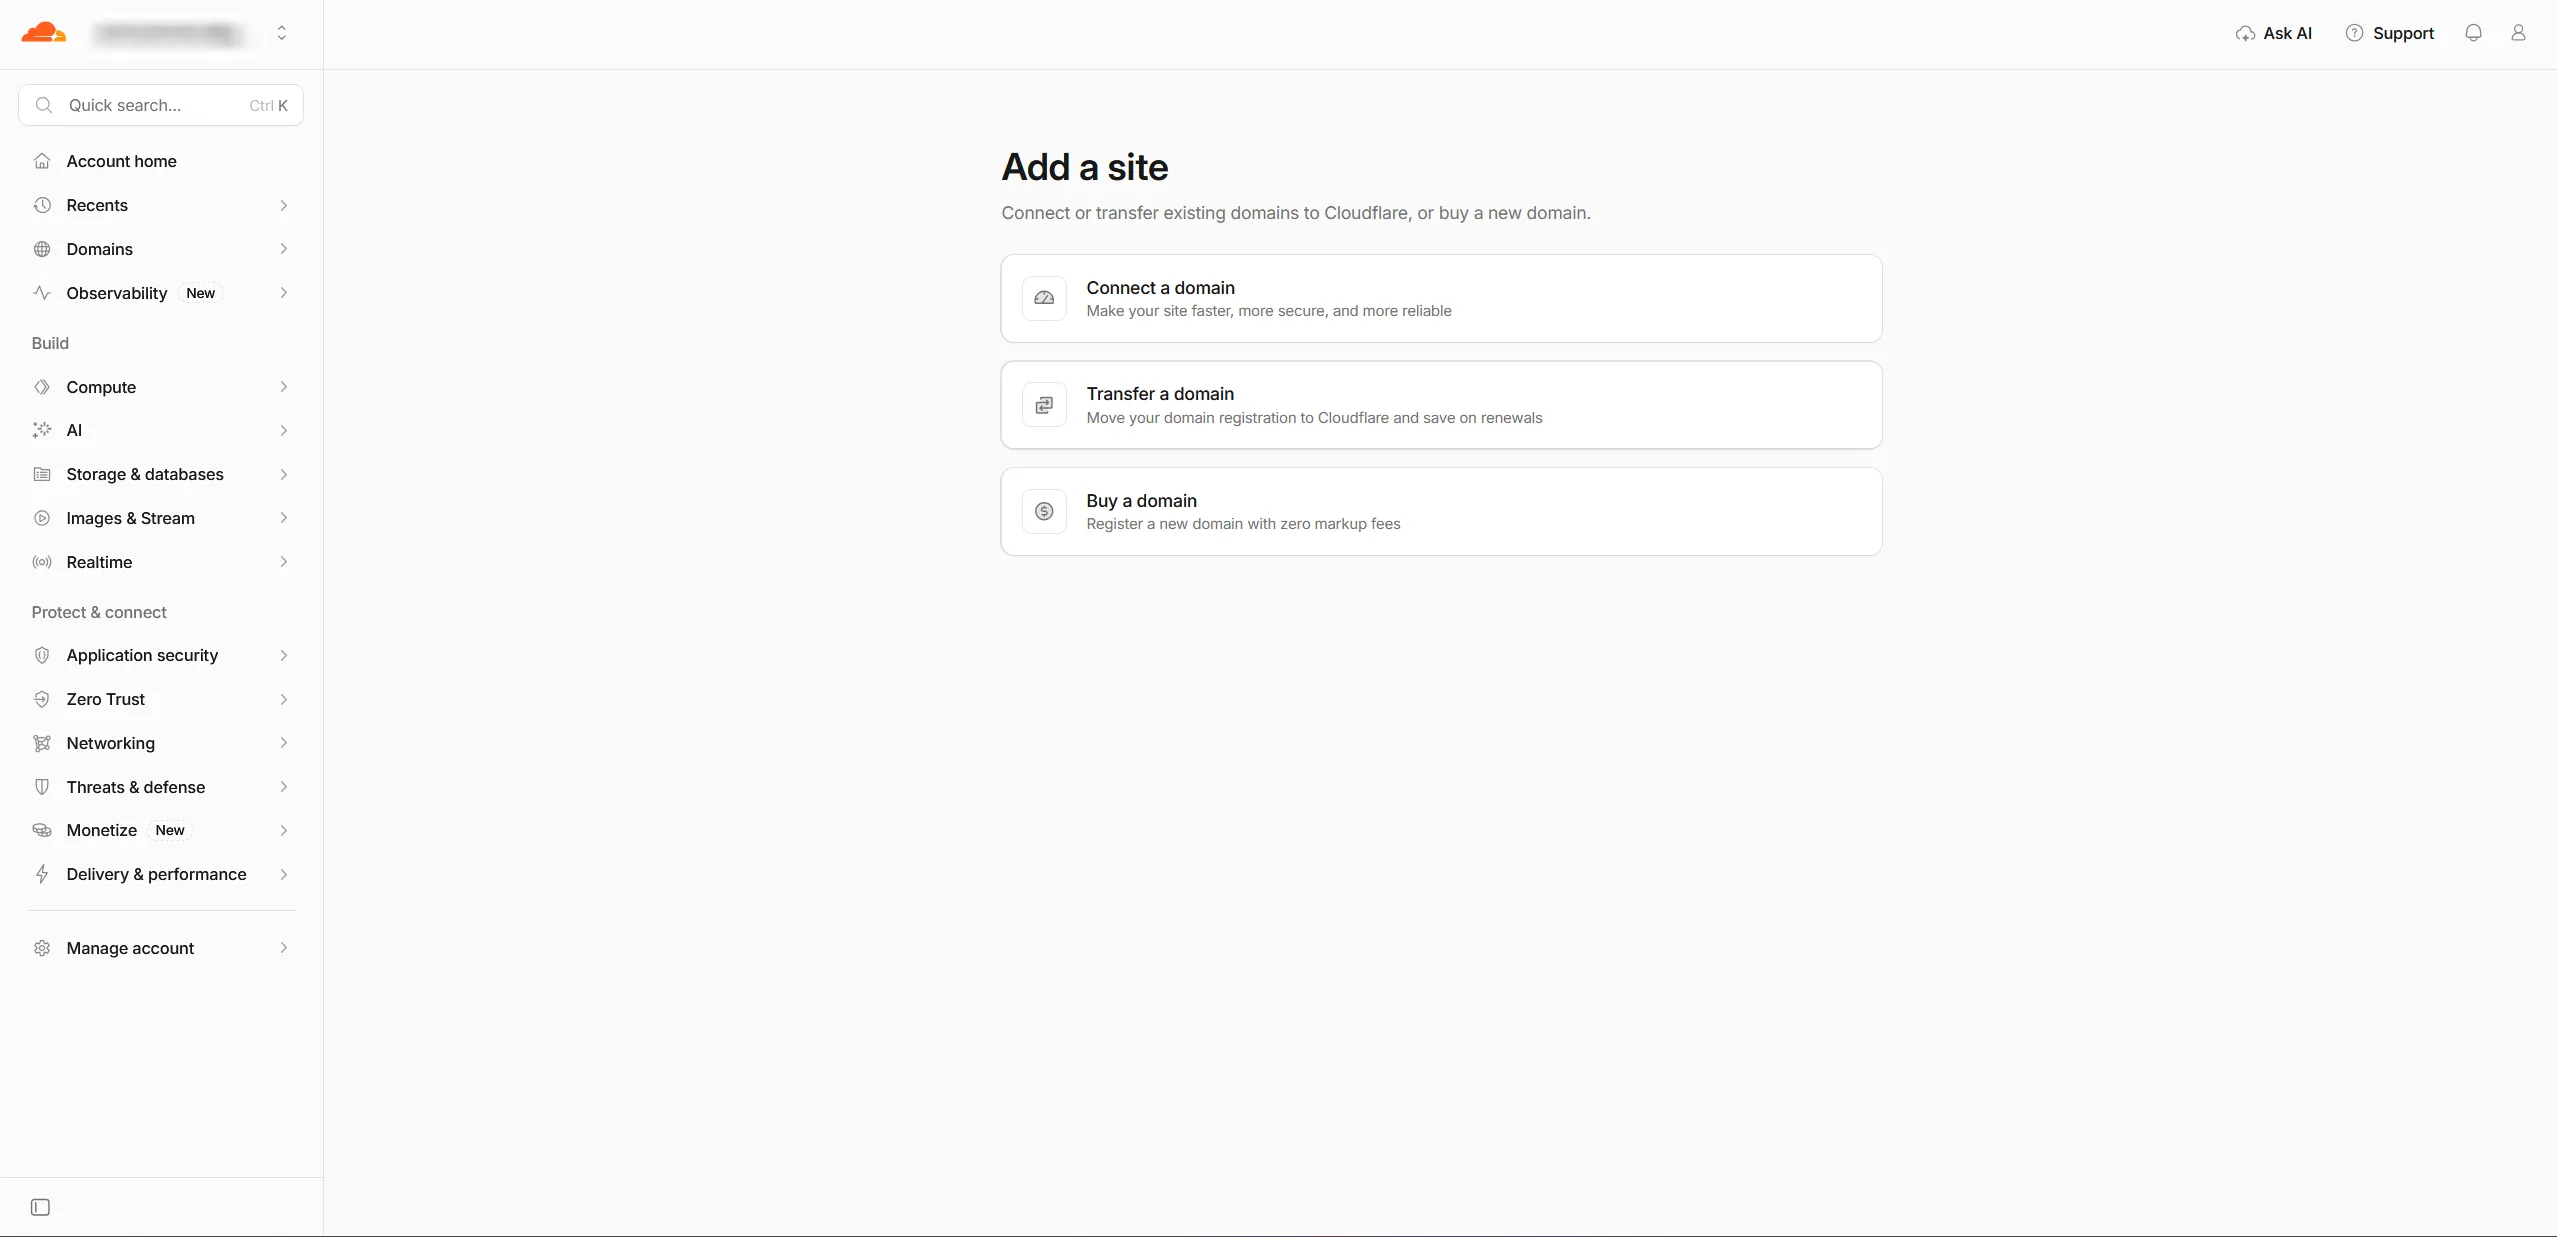
Cloudflare then gave me two nameservers. Mine are glen.ns.cloudflare.com and kate.ns.cloudflare.com, which means my website is now in the hands of Glen and Kate. I don’t know who they are, but they’ve been very reliable so far. At the registrar I switched from the default nameservers to custom ones and entered those two.
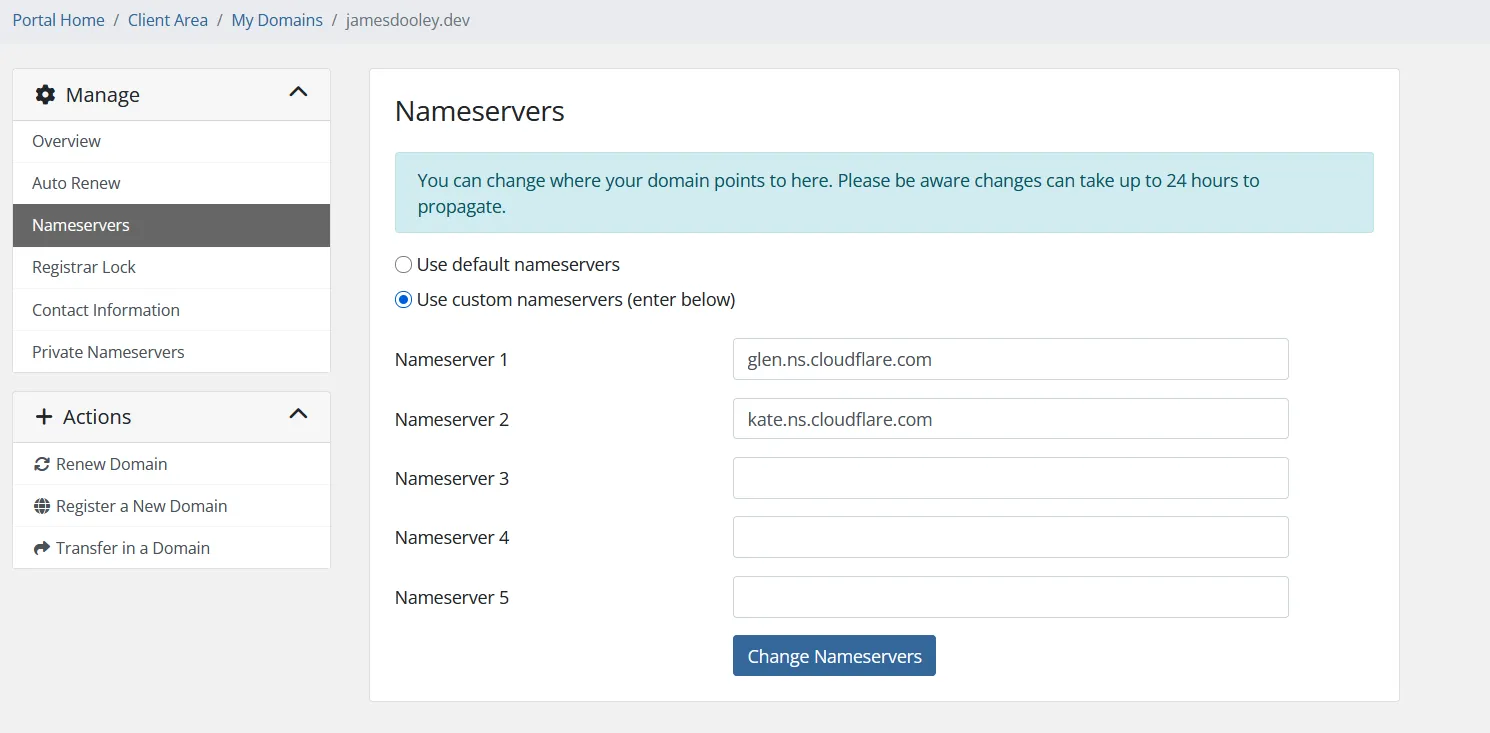
What this actually does: nameserver (NS) records tell the rest of the internet “for anything about jamesdooley.dev, go ask these servers.” Once the change spreads (the registrar warns it can take up to 24 hours), Cloudflare is in charge of every DNS record for the domain. The registrar still owns the registration, but Cloudflare answers all the questions.
Step 2: Email on my own domain
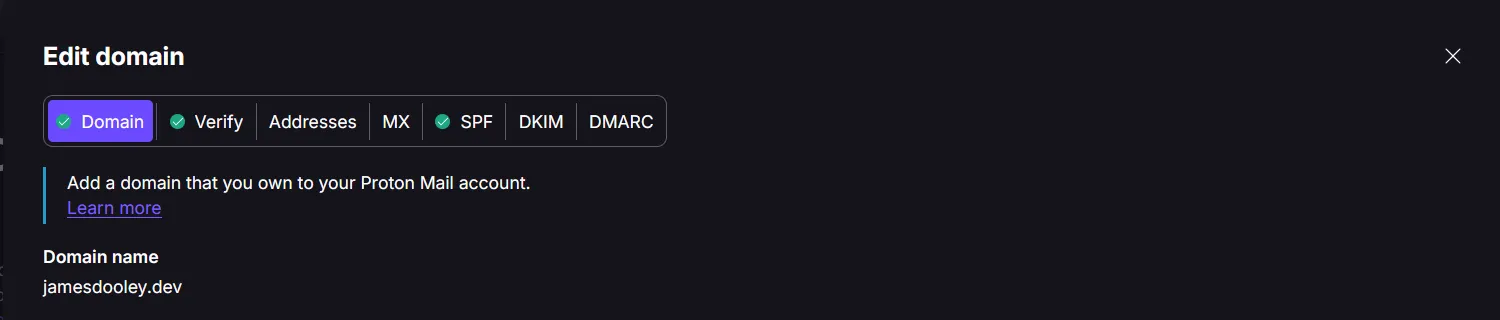
I already pay for Proton Unlimited, which includes custom domains, so email didn’t cost anything extra. In Proton I added jamesdooley.dev as a custom domain, and it walked me through each record I needed to add in Cloudflare.
Here’s what ended up in Cloudflare, with the unique values blurred out:
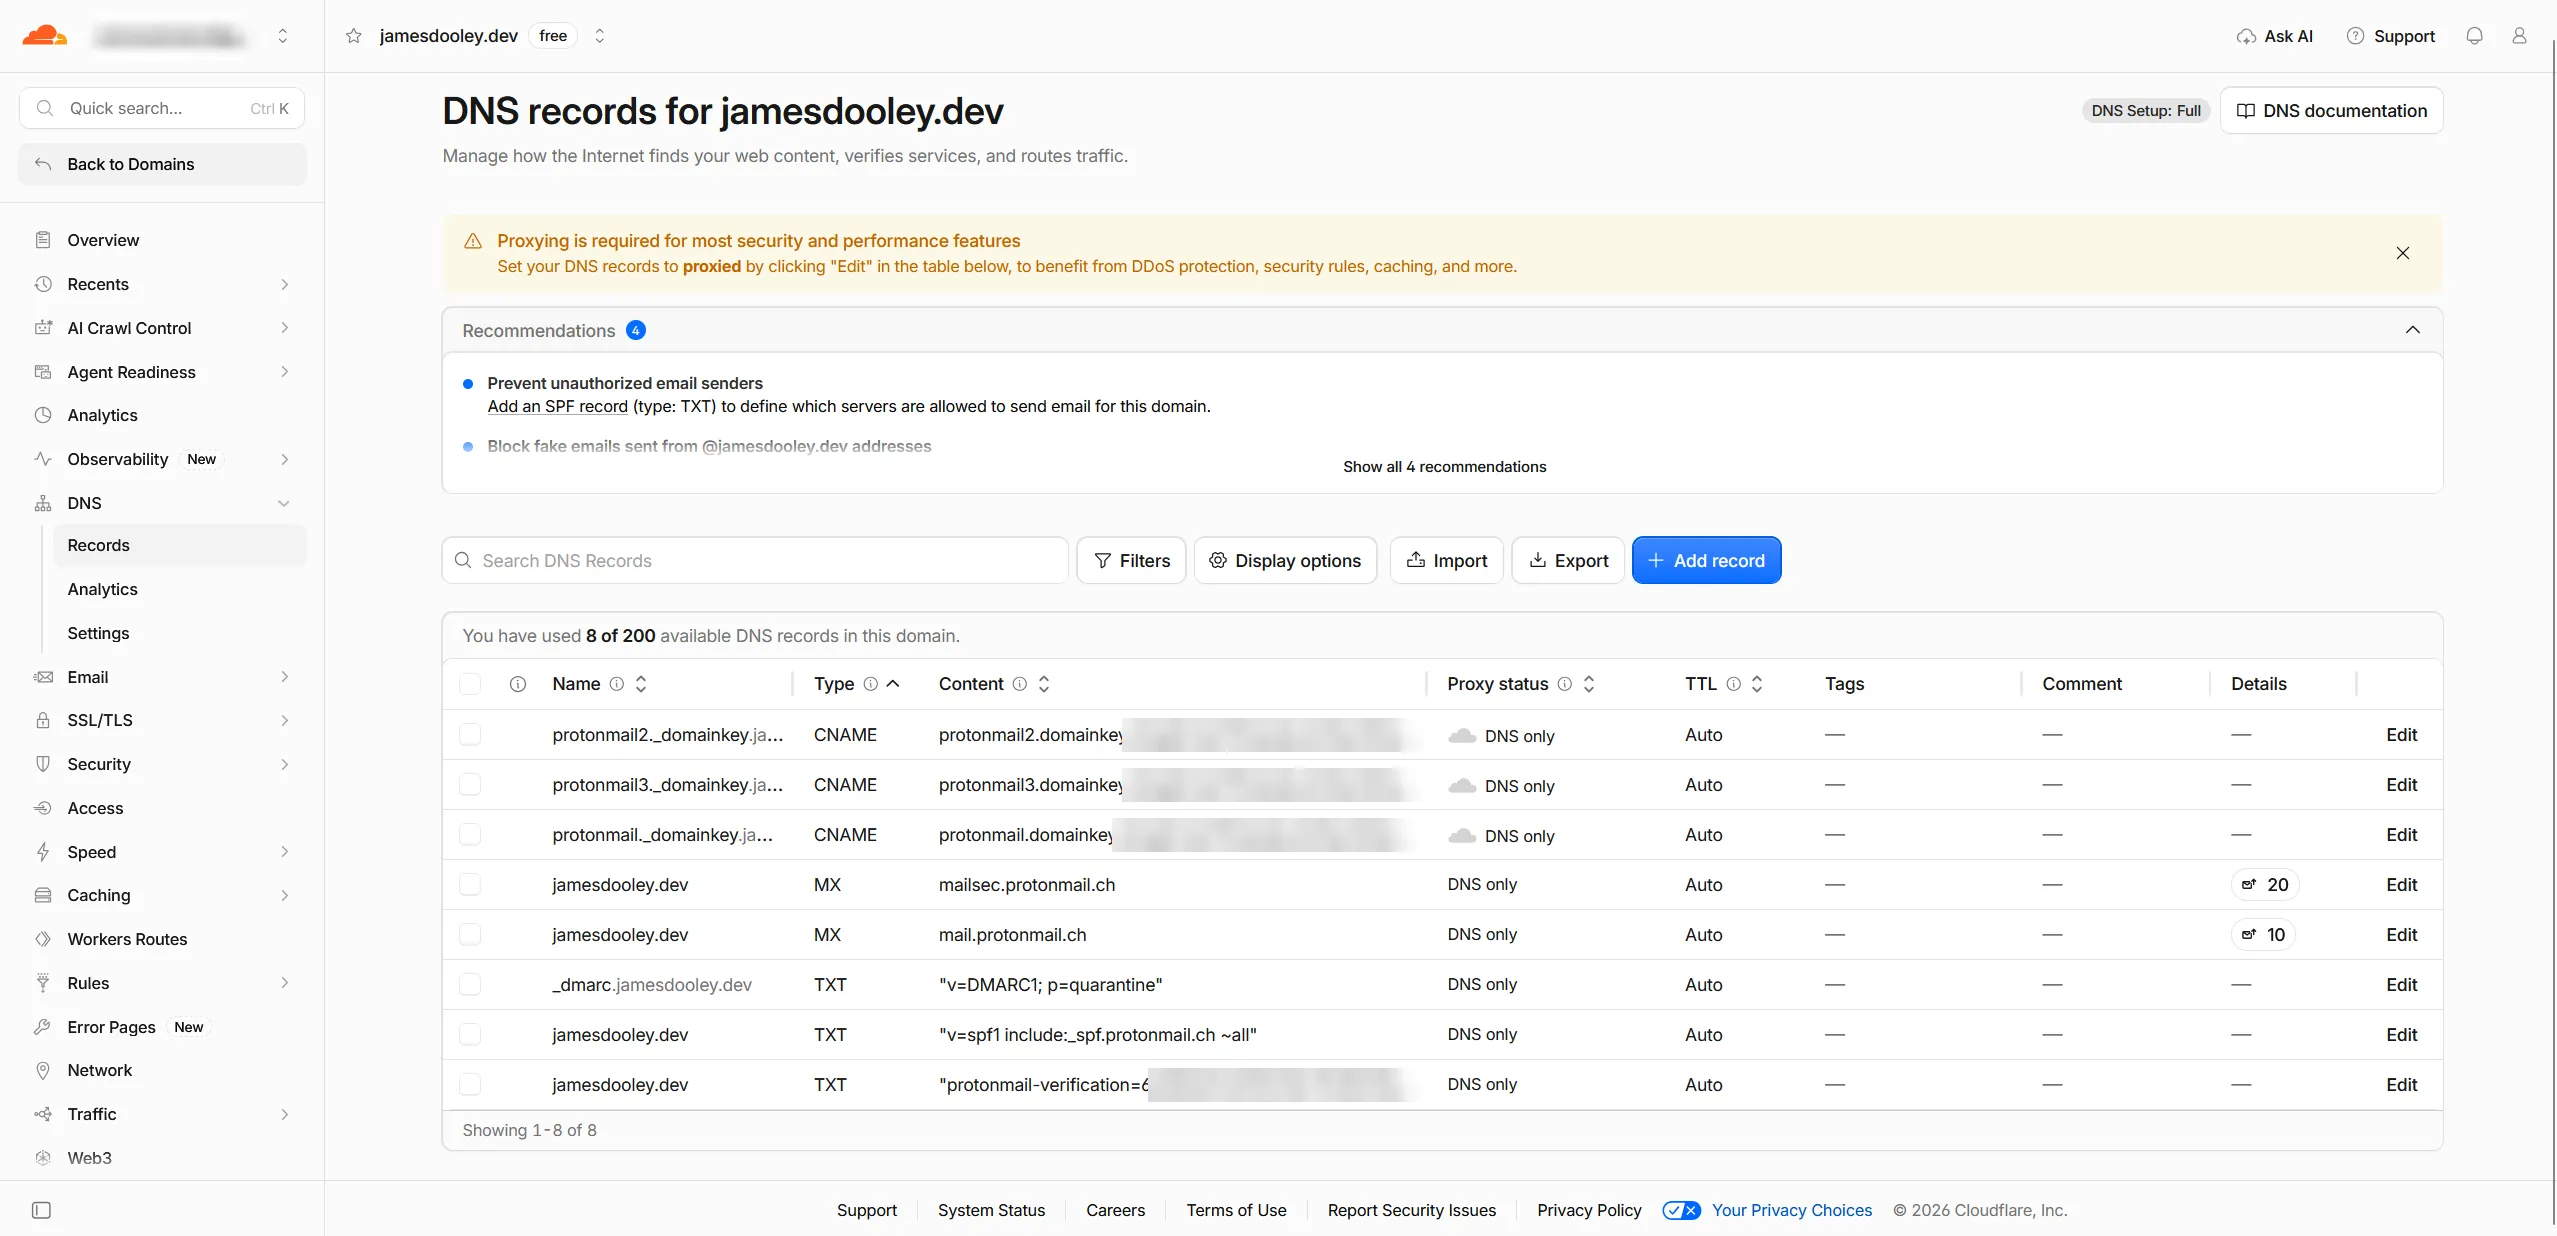
And here’s what each one does, because this was the part I learned the most from:
| Record | Value (simplified) | What it does |
|---|---|---|
TXT @ |
protonmail-verification=... |
Proves to Proton that I actually own the domain |
MX @ (priority 10) |
mail.protonmail.ch |
“Send email for this domain here.” Lower number = tried first |
MX @ (priority 20) |
mailsec.protonmail.ch |
Backup mail server if the first one doesn’t answer |
TXT @ |
v=spf1 include:_spf.protonmail.ch ~all |
SPF: the list of servers allowed to send email as @jamesdooley.dev |
CNAME protonmail._domainkey (x3) |
points to Proton’s DKIM keys | DKIM: lets receivers check a cryptographic signature on every email I send |
TXT _dmarc |
v=DMARC1; p=quarantine |
DMARC: tells receivers what to do if an email fails SPF and DKIM. quarantine means “send it to spam” |
A few things I didn’t know before this:
- SPF, DKIM and DMARC work together. SPF checks which server sent the email. DKIM checks that the email wasn’t changed and really came from my domain. DMARC is the policy on top that says what to do when those checks fail, and makes sure the domain in the “From” line actually lines up with them. Without these, anyone could send email pretending to be @jamesdooley.dev and most inboxes would have no way to tell.
- The DKIM records have to be “DNS only.” Cloudflare can proxy records (the orange cloud), but if you proxy the DKIM CNAMEs, DKIM breaks. You can see the gray clouds next to them in the screenshot.
~allvs-allin SPF.~allis a “soft fail,” meaning mail from other servers is suspicious but not automatically rejected. It’s the safer setting while you’re still getting things working. I’ll probably tighten it later.
If you want to check your own records, dig works from any Linux or Mac terminal:
dig NS jamesdooley.dev +short          # which nameservers are in charge
dig MX jamesdooley.dev +short          # where email gets delivered
dig TXT jamesdooley.dev +short         # SPF and the verification record
dig TXT _dmarc.jamesdooley.dev +short  # the DMARC policy
Addresses and keeping them organized
Next I created a few addresses on the domain:
- helloworld@ is my public contact address, listed on the contact page
- abuse@ is the standard address people use to report problems with a domain
- dmarc@ is for automated DMARC reports from other mail providers
- a private address that I only use for applications and recruiters
On my plan, all of these land in one shared inbox, which gets messy fast. So I made a folder for each address and a filter that automatically moves mail into the right folder based on who it was sent to.
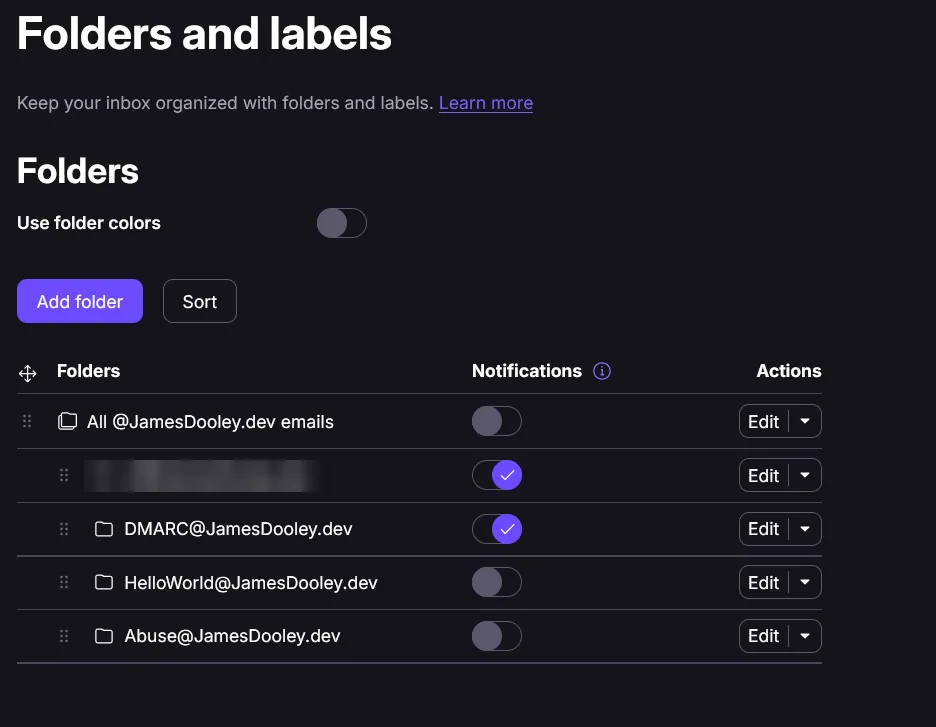
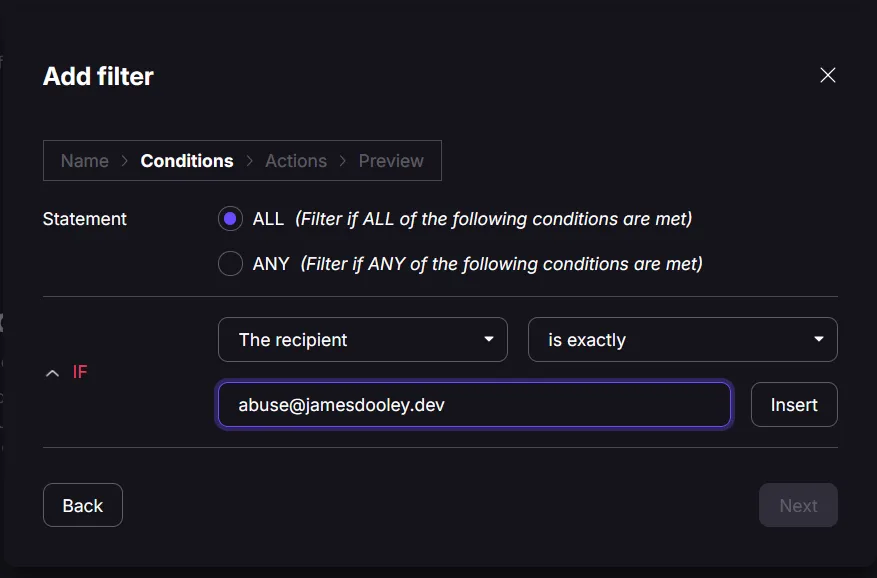
The public address is the one that will get spam, so if it ever gets out of hand, I can delete it and make a new one without touching anything else.
Step 3: Straight to spam
With everything set up, I sent my first email to my Gmail account. It went straight to spam.
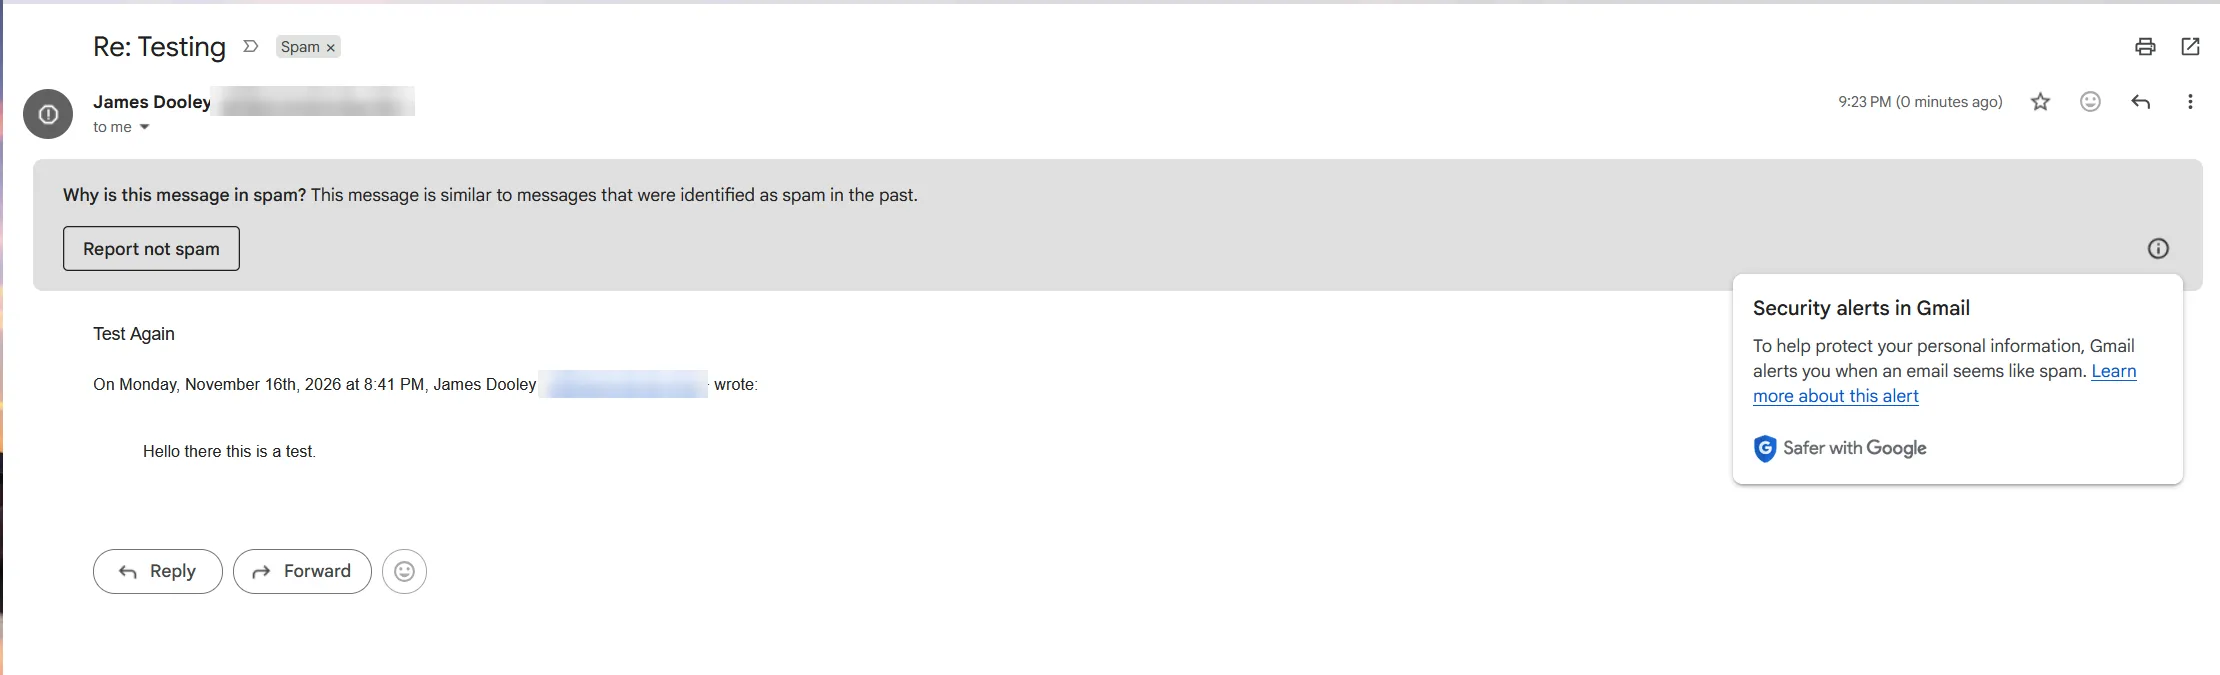
To be fair to Gmail, my email came from a domain that was about a day old and said “Hello there this is a test.” That’s pretty much exactly what a spammer testing a new domain would send.
My first thought was that I had messed up a record, so I checked. In Gmail you can open an email, click the three dots and pick Show original to see the authentication results.
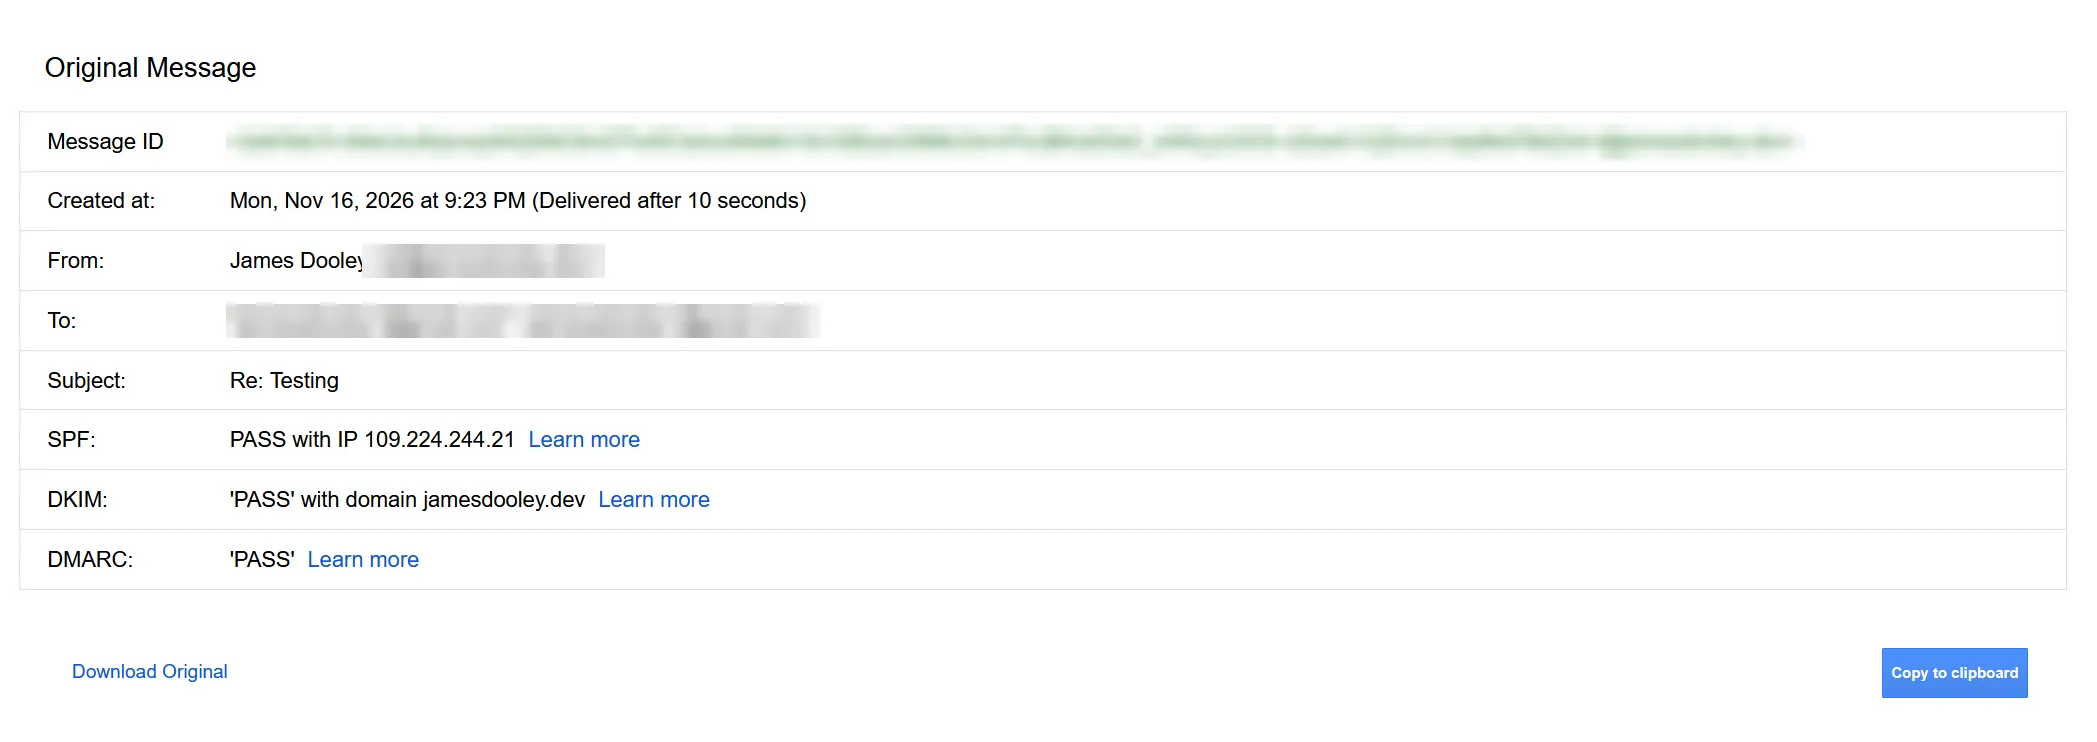
All three passed, and DKIM passed with my own domain, which is exactly what you want. So the setup was right. The problem was reputation. Gmail had never seen my domain before and had no history to trust it. The fix for that is just time and normal use: mark it as “not spam,” add the address to your contacts, reply back and forth, and send real emails instead of one-line tests.
To double check everything, I used mail-tester.com, which gives you a one-time address to send an email to and then grades it on authentication, blocklists and content.
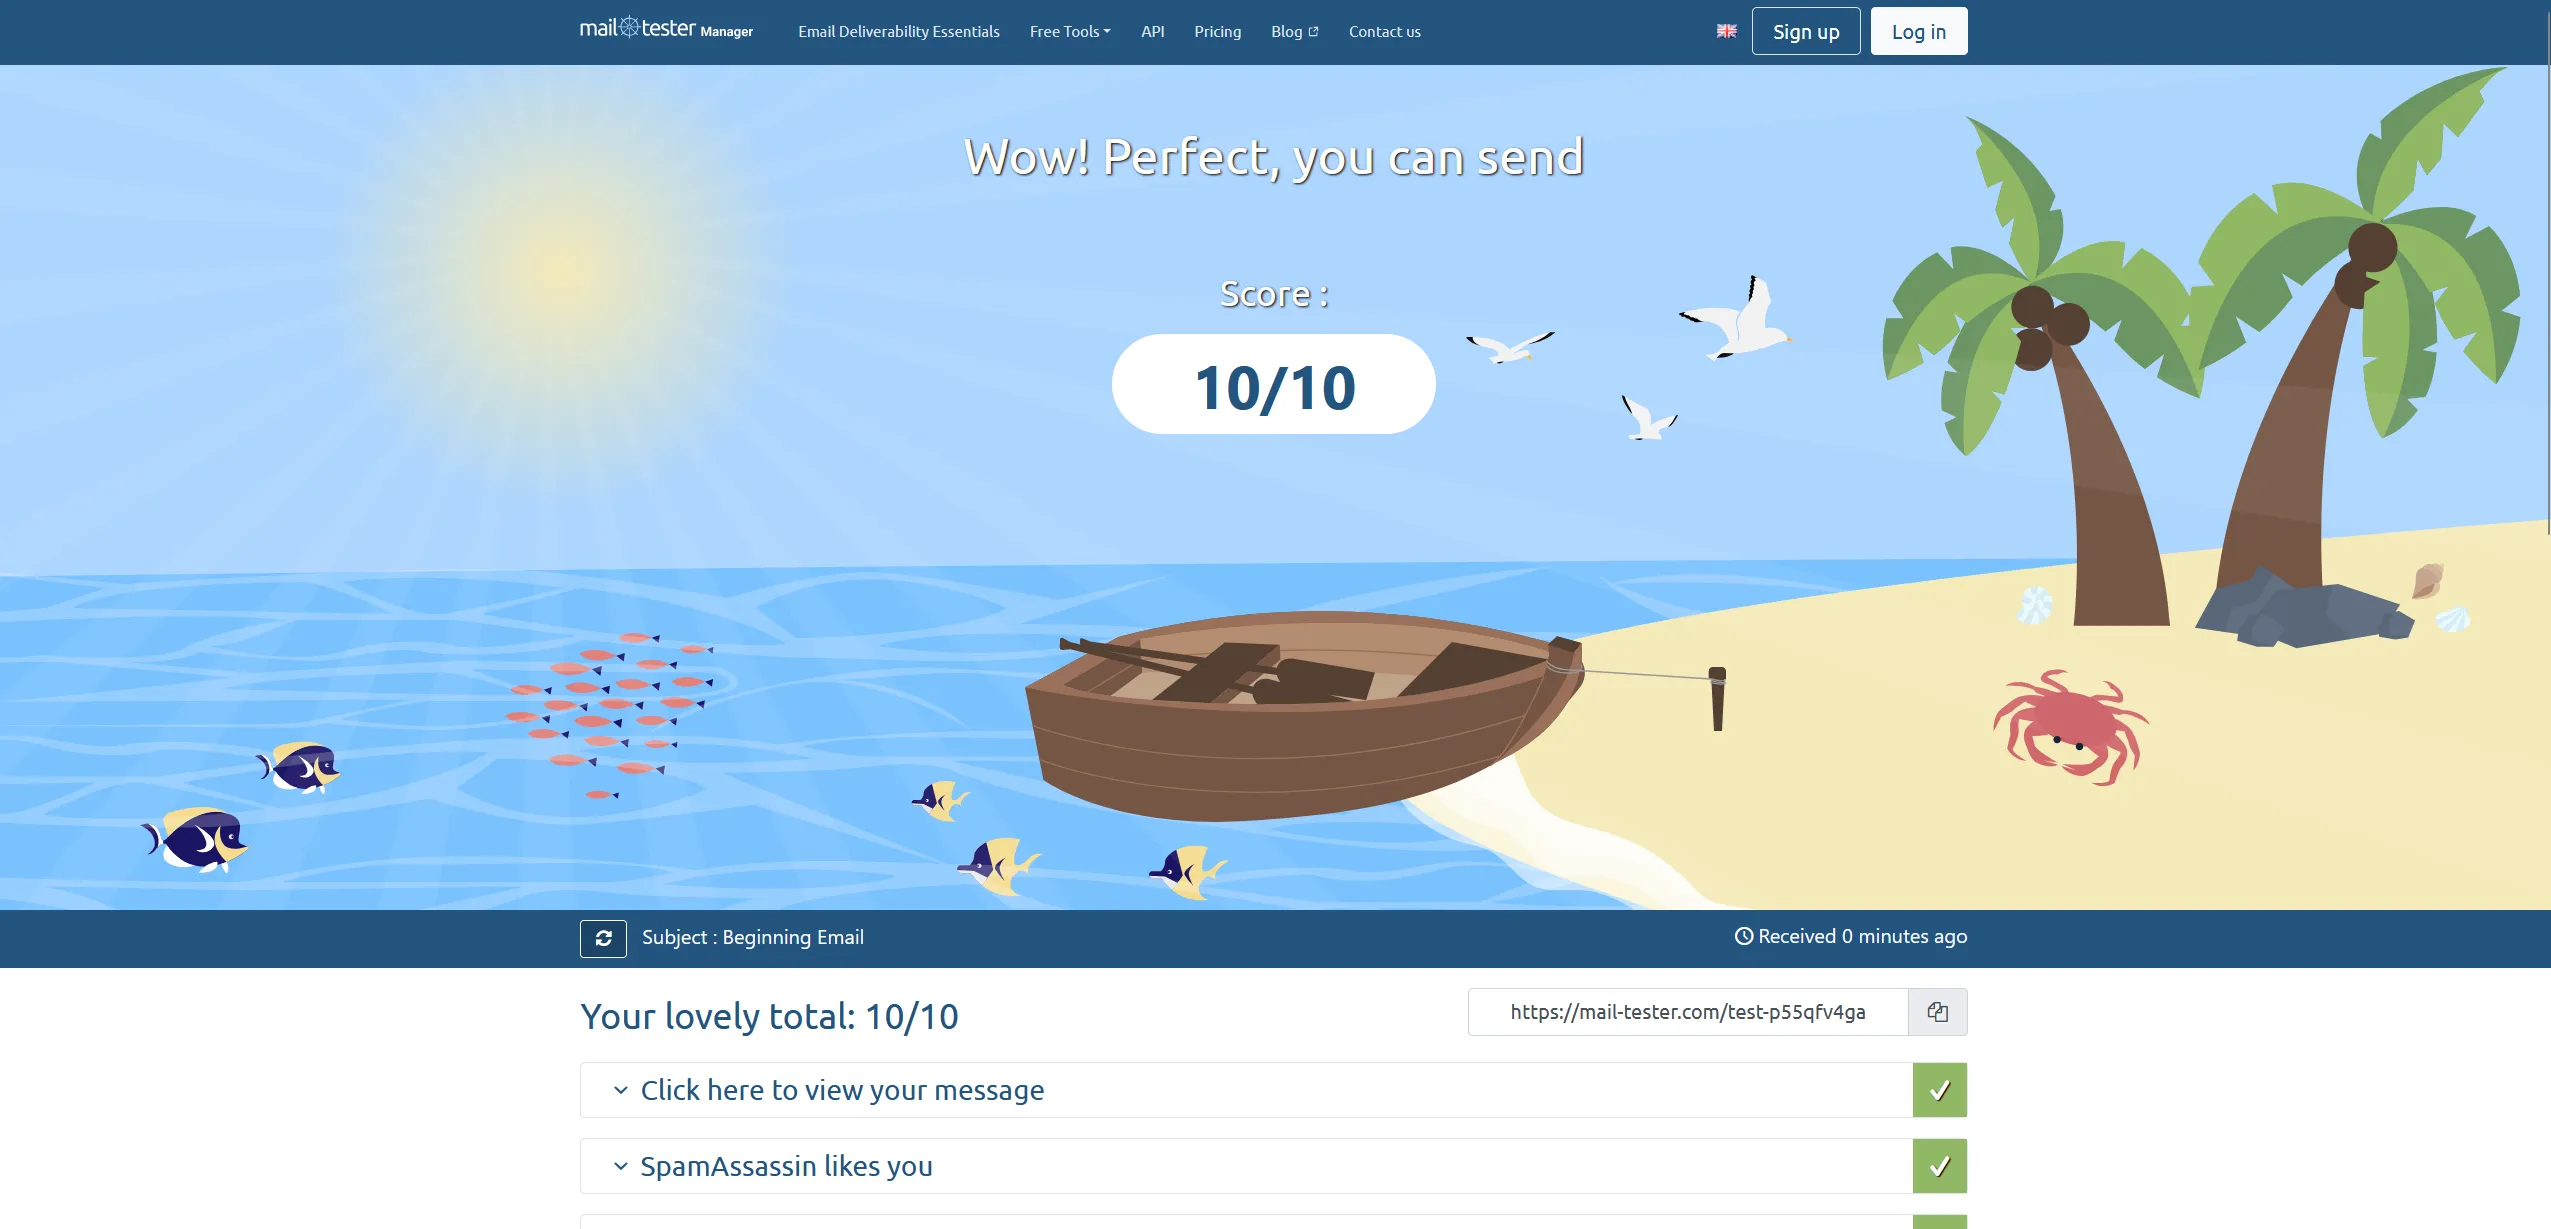
10/10, with “Wow! Perfect, you can send.” Mail-tester was a lot nicer to me than Gmail was.
Step 4: Building the site
For the website itself I chose Astro, a static site generator. “Static” means the site is just plain HTML, CSS and a little JavaScript, with no server code and no database. That’s great for security, because there’s no login page, no database to get into, and nothing running on a server that needs patching. It’s also fast, and Astro is built for content, so I can write projects and write-ups in Markdown files and it turns them into pages.
This is where the AI part comes in. Instead of asking Claude Code to “make me a website” in one prompt, I worked with Claude to write a detailed spec file called CLAUDE.md. It covers the stack, the design (a dark, terminal-style theme that’s still easy to read), every page, the format for projects and write-ups, security headers, and a list of build phases. Claude Code builds one phase at a time and stops after each one so I can review it, ask it to explain what it did, and commit it.
I kept all the account and infrastructure work (Cloudflare, Proton, DNS, GitHub settings) for myself. That’s the part I wanted to really learn, and it’s also the part where a mistake actually matters.
For now the goal was a working template. The structure and all the core pages are built, and the content is still TODO(james) placeholders that I’ll fill in over time.
Step 5: Deploying (and breaking it first)
The code lives in a private GitHub repo. I connected that repo to Cloudflare so that every push to main automatically builds and deploys the site. I also gave Cloudflare’s GitHub app access to only that one repo, not my whole account.
Cloudflare now pushes new projects toward Workers instead of its older Pages product, so that’s what I created. The build ran, and the log looked great. Every page built:
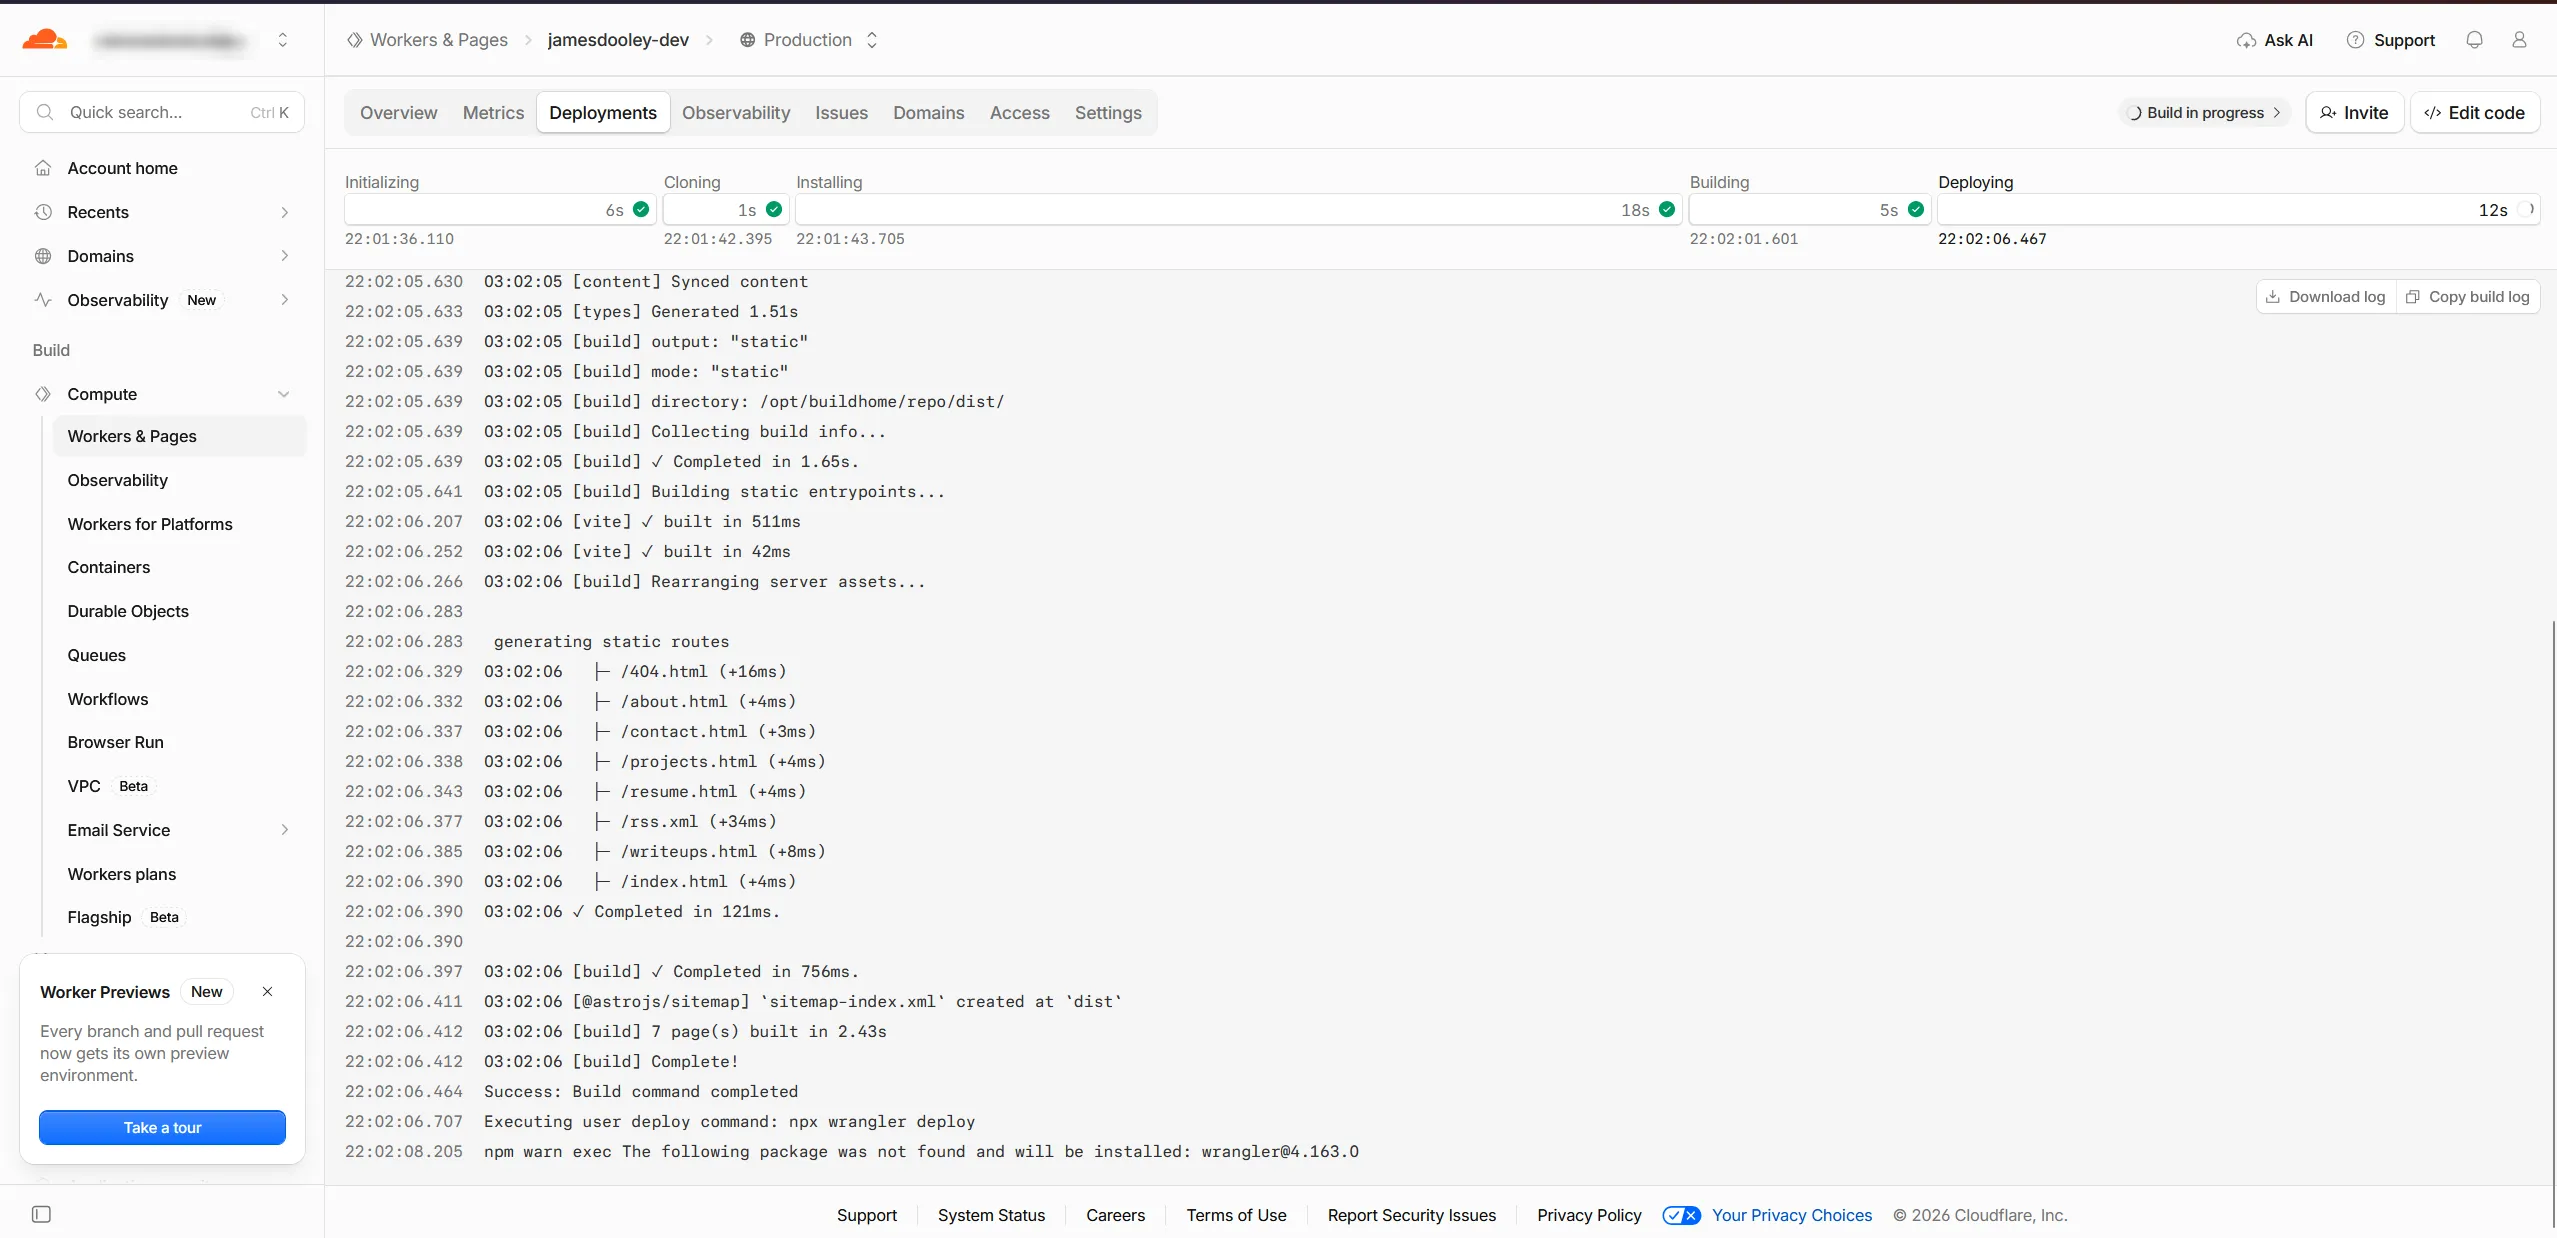
Then the very last step failed.
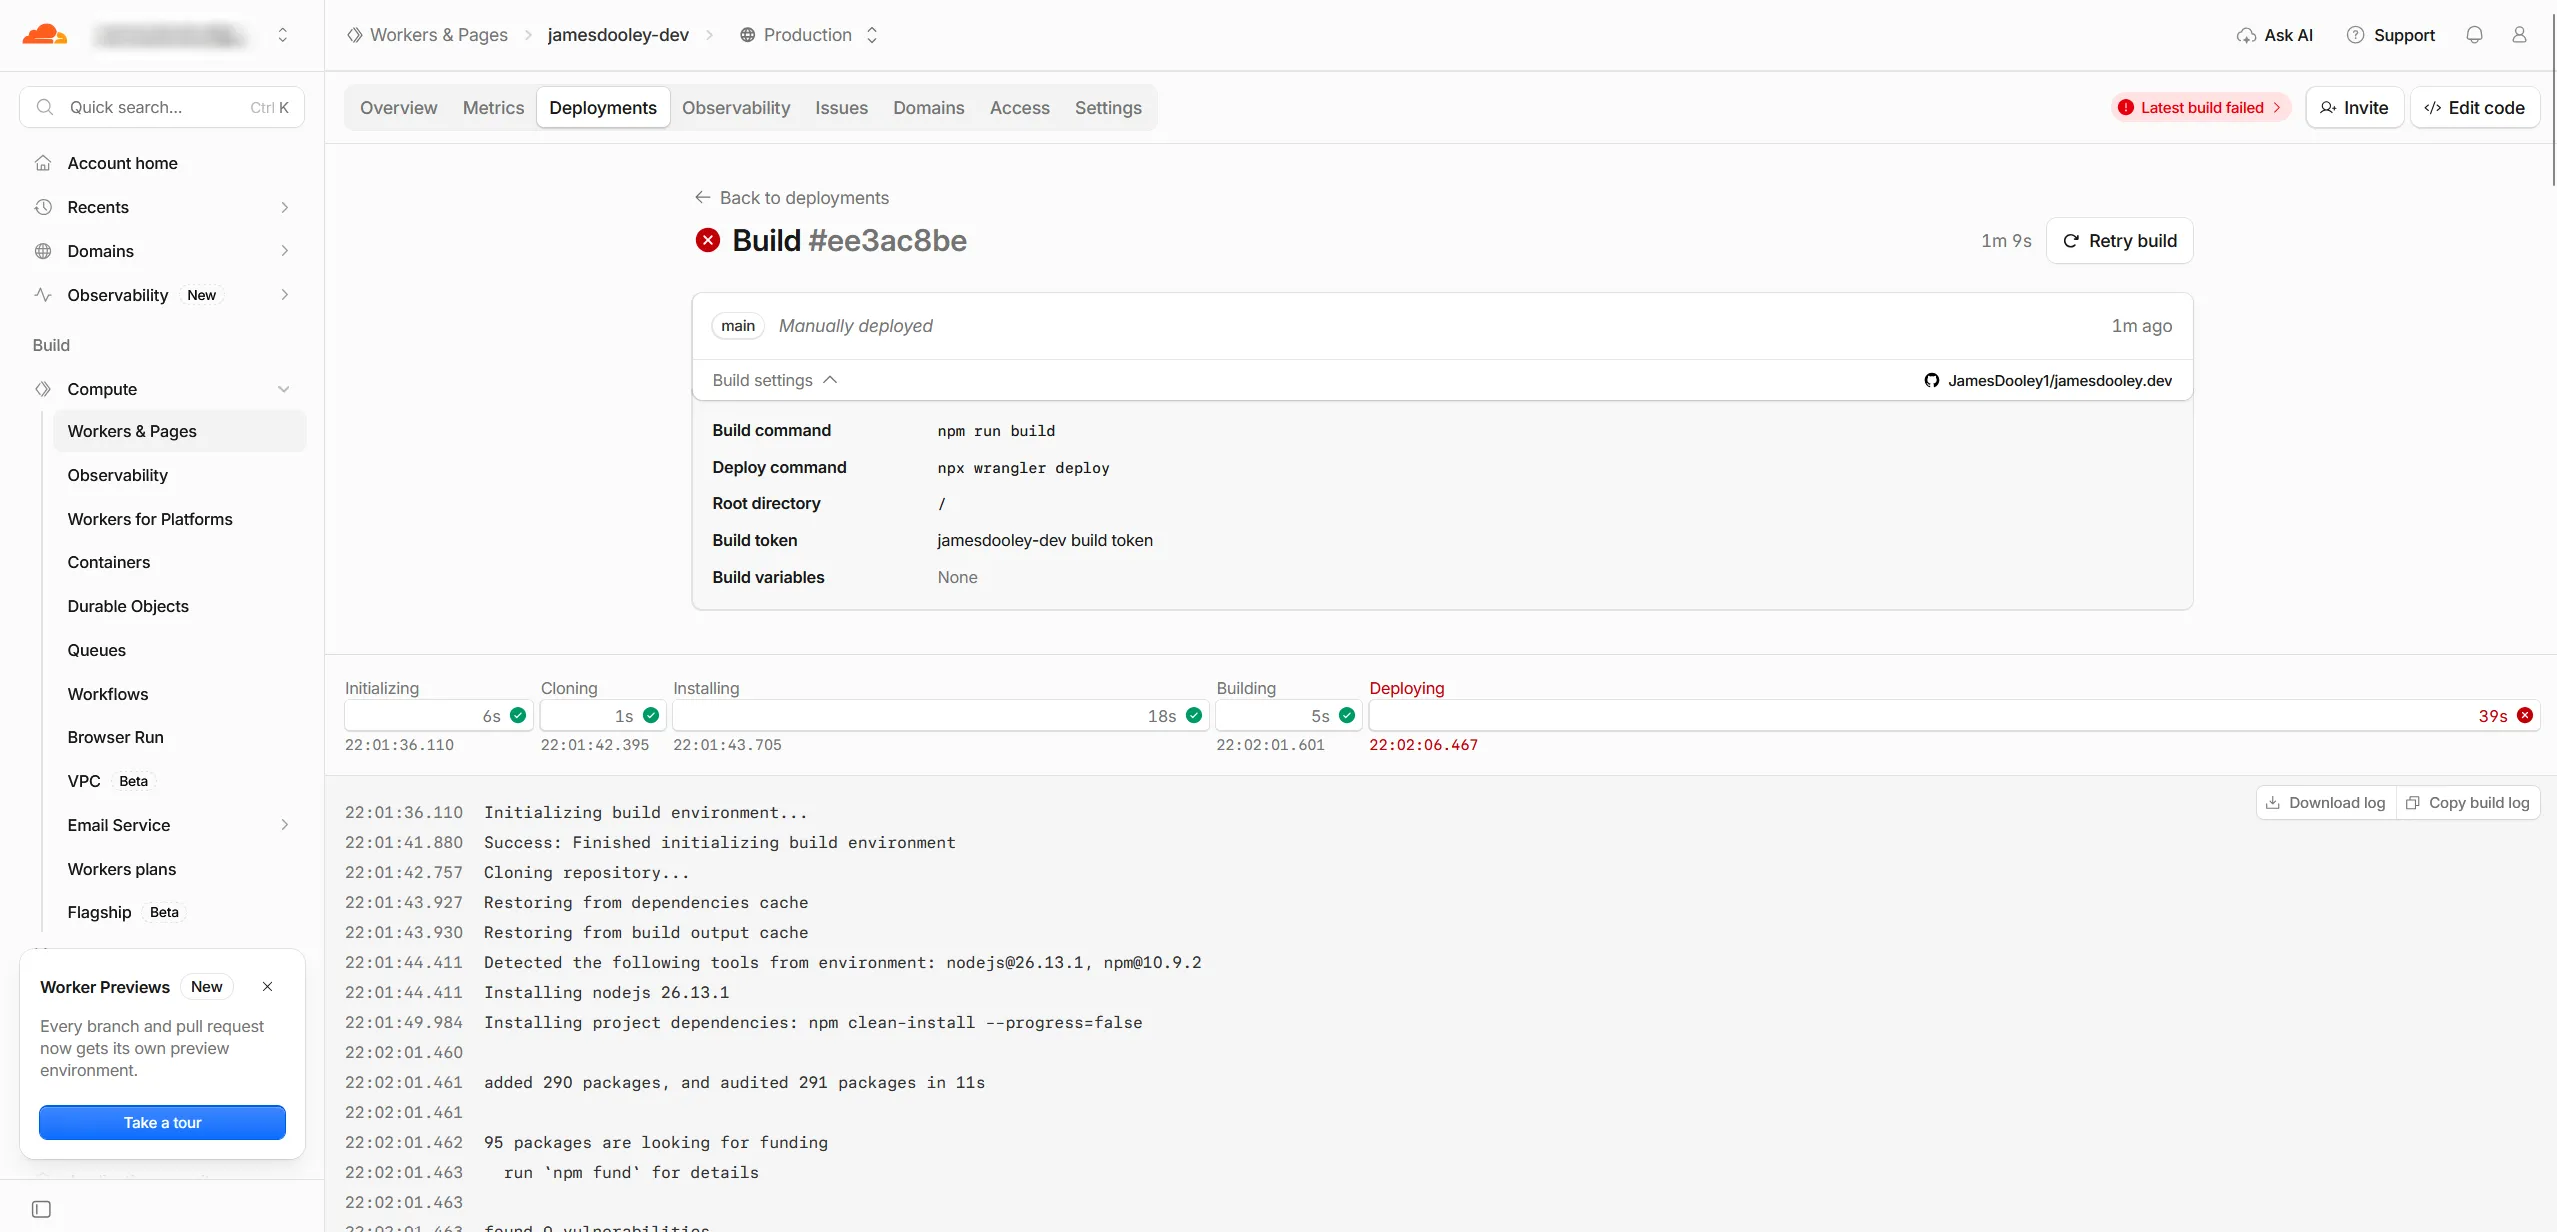
Here’s what happened. A Workers project deploys with this command:
npx wrangler deployWrangler is Cloudflare’s deploy tool, and it expects a config file called wrangler.jsonc in the repo. I didn’t have one, so Wrangler tried to auto-configure the project and got it wrong in two ways:
- It tried to add the
@astrojs/cloudflareadapter, which would turn my simple static site into a server-rendered app. Not what I wanted at all. - It named the Worker
jamesdooley.dev(from mypackage.json), and Worker names can’t have dots in them. That’s what actually crashed the deploy.
The fix was to add a small config file that tells Cloudflare “just serve the static files Astro builds, nothing else.” I had Claude Code add it, along with pinning Wrangler as a dev dependency:
{
  "$schema": "./node_modules/wrangler/config-schema.json",
  "name": "jamesdooley-dev",
  "compatibility_date": "2026-11-01",
  "assets": {
    "directory": "./dist",
    "not_found_handling": "404-page"
  }
}
What each line does:
name: the Worker’s name. No dots this time, and it matches the project name in Cloudflare.compatibility_date: tells Cloudflare which version of its runtime behavior to use.assets.directory: serve the files Astro builds into thedistfolder.not_found_handling: show my custom 404 page when someone goes to a page that doesn’t exist.- There’s no
mainfield, which means there’s no server code at all. It’s purely static files.
I pushed that change and the next deploy went through.
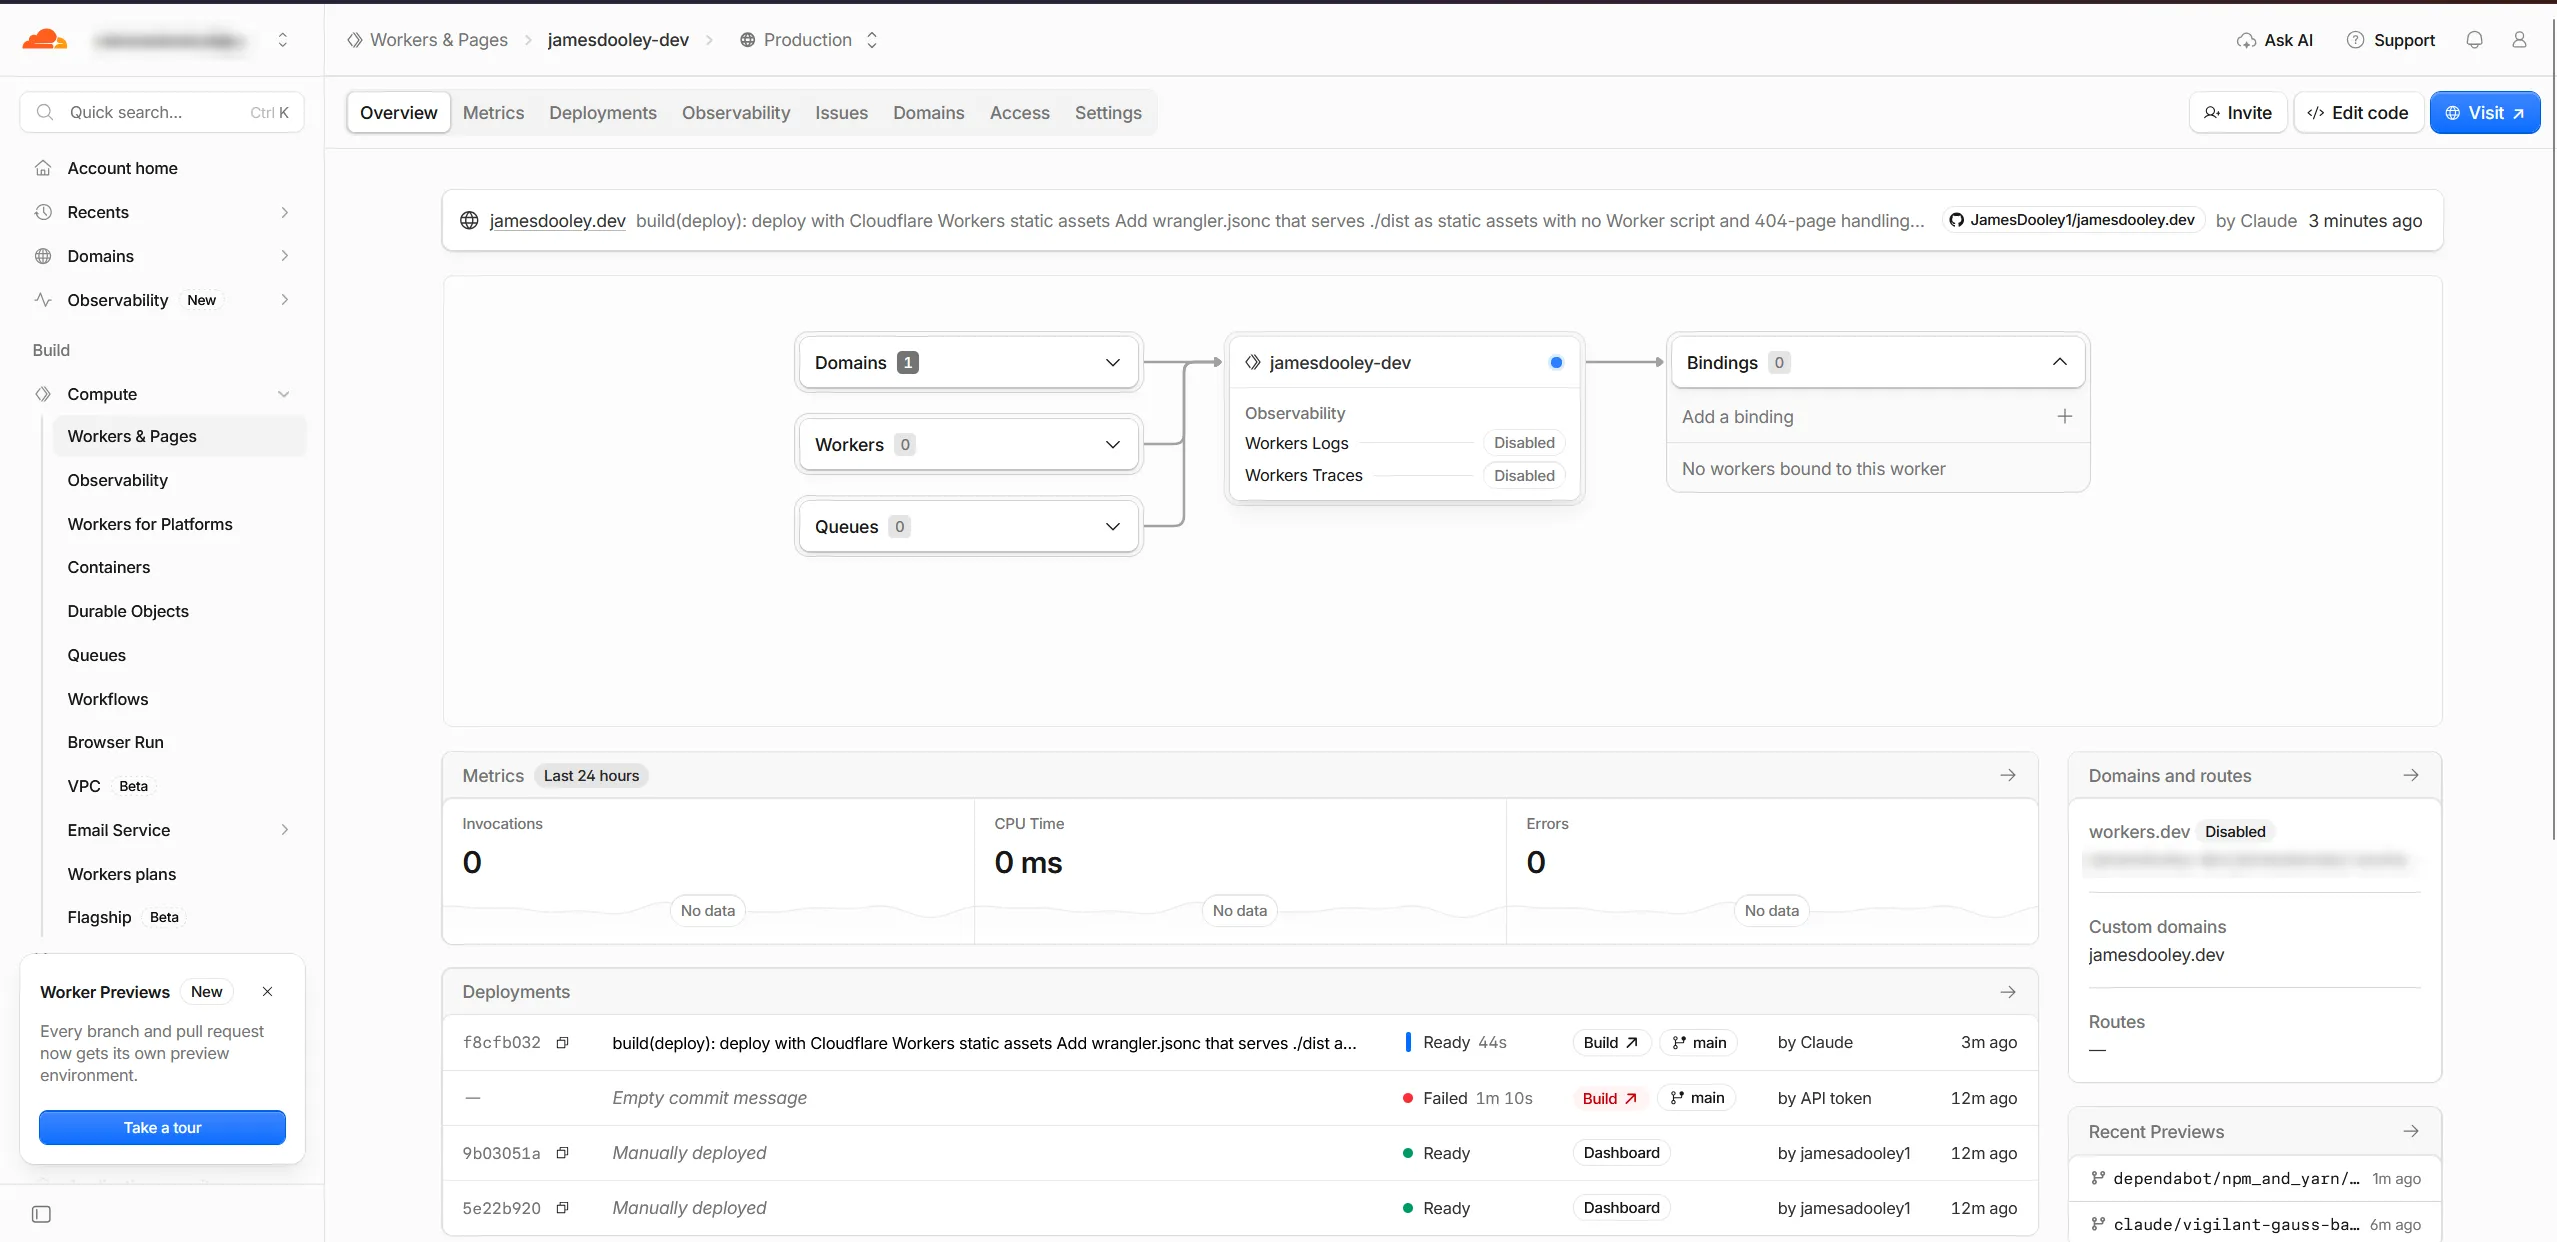
The last step was adding jamesdooley.dev as a custom domain on the Worker. Cloudflare created the DNS record and the TLS certificate automatically. That’s important for a .dev domain, because browsers will only ever load .dev sites over HTTPS. No certificate, no website.
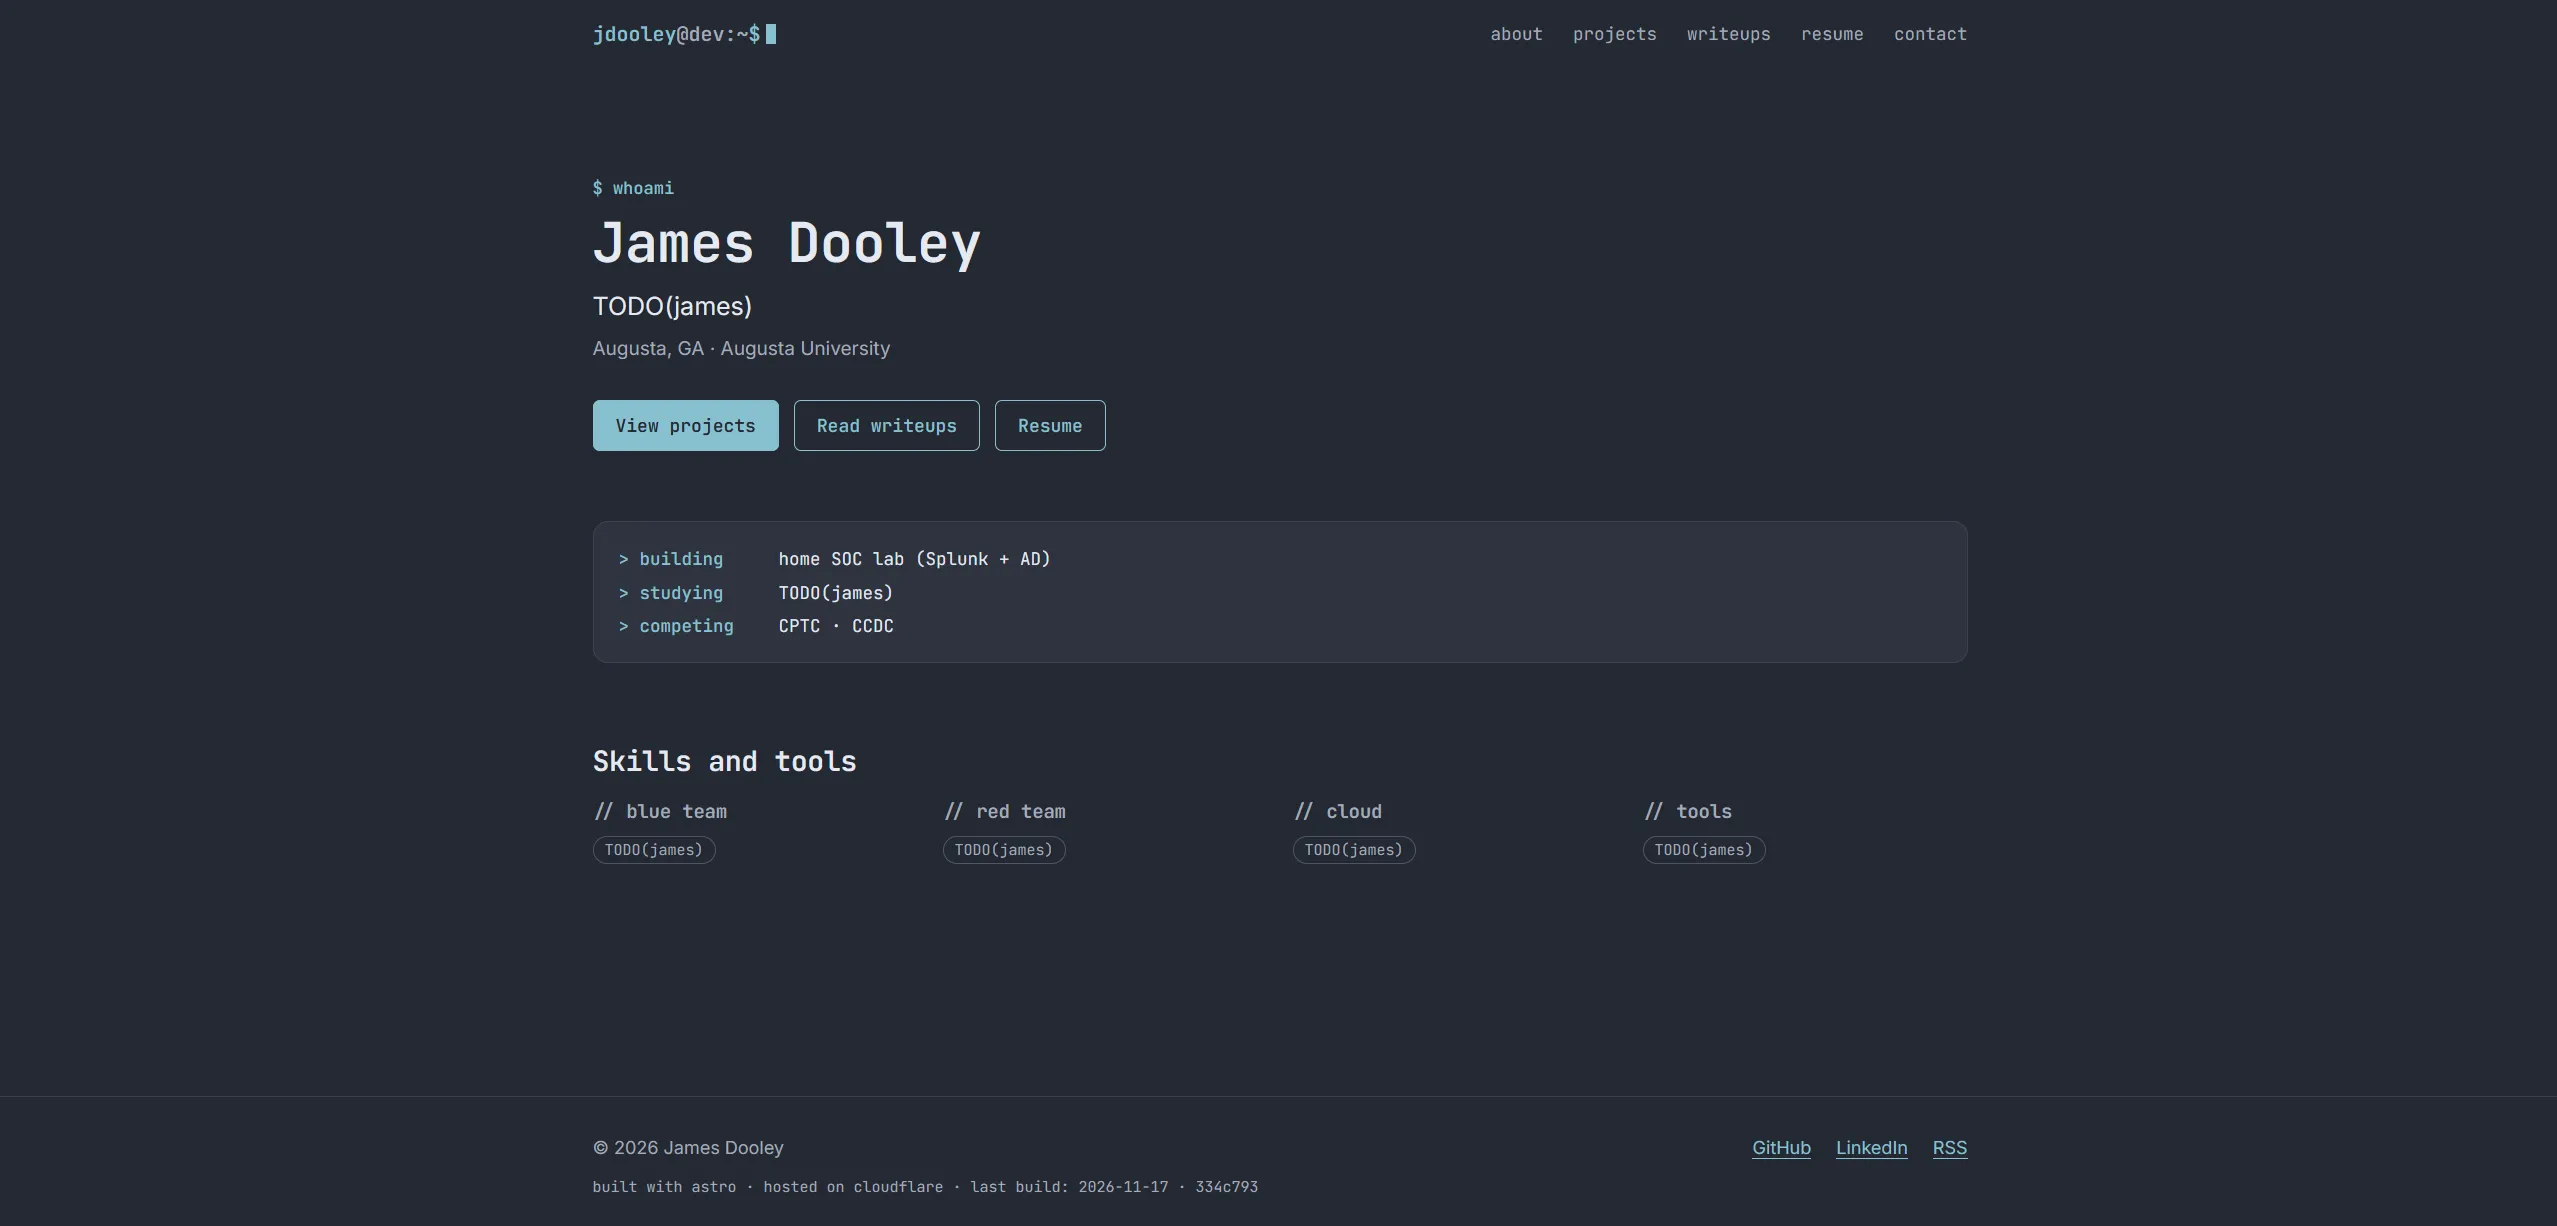
Step 6: Locking it down
A static site on Cloudflare is already pretty low-risk, since there’s no server, database or login form to attack. The bigger risk is someone taking over one of the accounts behind it. Whoever controls my Cloudflare, GitHub, Proton or registrar account controls my website and my email. So that’s where I started.
What I’ve done so far:
- 2FA on every account involved: Cloudflare, GitHub, Proton and the registrar.
- Registrar lock turned on, so the domain can’t be transferred away from me.
- Cloudflare’s GitHub app limited to just the website repo.
- SSL/TLS mode set to Full (strict). Cloudflare encrypts the connection all the way through and checks that the certificate is valid, instead of just encrypting half the trip.
- Always Use HTTPS on, and minimum TLS version set to 1.2, so old, weak versions of TLS aren’t allowed.
- The
workers.devURL turned off, so the site only exists at jamesdooley.dev and not at a second Cloudflare address too.
Then I ran the domain through SSL Labs, which tests the TLS setup from the outside.
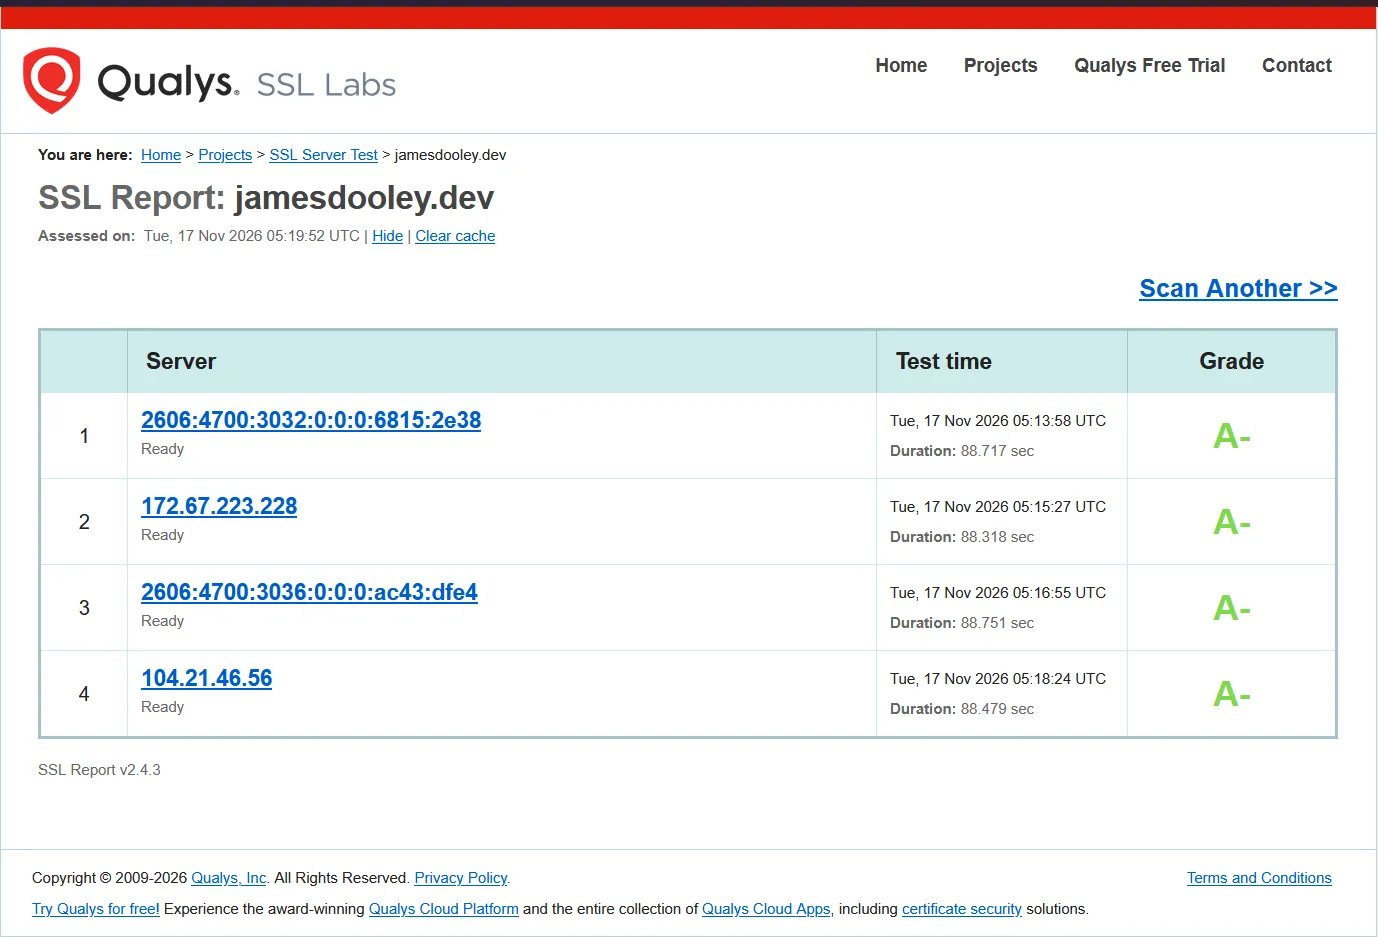
An A- is a solid start. Getting to A+ needs things like HSTS, which tells browsers to always use HTTPS for my site, and that’s part of what’s coming next.
What I haven’t done yet: DNSSEC, security headers (like a Content Security Policy), and GitHub secret scanning and Dependabot. I’m saving those for a separate project that’s all about hardening the site as much as possible, with before and after scores.
What it cost and how long it took
| Item | Cost |
|---|---|
| Domain (jamesdooley.dev) | About $13/year |
| Cloudflare DNS, hosting and TLS | $0 (free plan) |
| Proton Mail custom domain | $0 extra (already had Proton Unlimited) |
| GitHub private repo | $0 |
| Total | About $13/year |
All in, it took about 15 hours. A good chunk of that was learning how things work rather than actually clicking buttons, which was kind of the point.
What I learned
The biggest thing I learned is how many separate pieces have to work together just to have a website and an email address. The registrar, DNS, hosting, email provider and the codebase are all different services, and they’re connected by a handful of records and settings. Before this I knew what DNS was. Now I actually understand how a nameserver change, an MX record and a DKIM signature all fit together, and what breaks when one of them is wrong.
I also learned a lot more about the protocols themselves. SPF, DKIM and DMARC make a lot more sense after you’ve set them up yourself and watched Gmail grade them. The same goes for TLS and how Cloudflare handles certificates.
It also made me think like someone who actually ships things. There are a lot of decisions you don’t think about until you have to make them. How should it be deployed, and why? Which stack? What information should be public, and what shouldn’t? What security settings matter most on day one, and what can wait? How should email be set up so it’s both professional and doesn’t get flooded with spam?
And finally, I got a lot more comfortable using AI tools for real work. Writing a clear spec and building in small phases worked way better than one giant prompt. When something broke, understanding the error myself made it a lot faster to get the right fix.
What’s next
The site is going to be home base for my resume, project write-ups, project files, contact info and whatever else I end up wanting to share. Right now it’s a template that works, and I’ll fill in the content as I go.
Next up for the site itself is a separate project focused on hardening it as much as possible: DNSSEC, security headers, HSTS, CAA records, GitHub security features, and before and after scores to show the difference.
You can find everything at jamesdooley.dev, or reach me through the contact page.